Introduction
Welcome to Studio
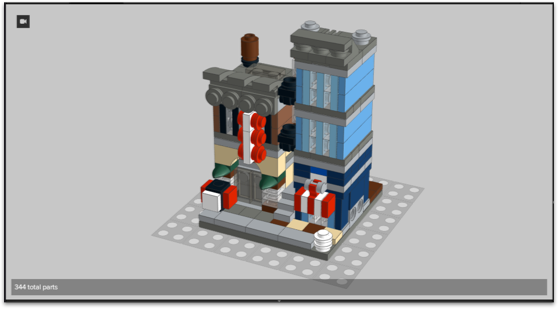
Studio is a desktop application that allows users to build LEGO models using virtual parts. Users will have have the freedom to build whatever they want with any part they want. By being integrated with the BrickLink catalog, Studio can do things like showing you what part colors are unavailable and letting you keep track of part costs. Stu.dio also makes it easy to turn a finished creation into a wanted list that you can use to order through BrickLink.
Starting a project
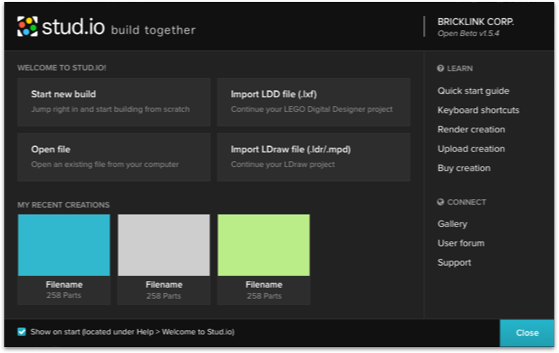
Welcome Screen
When launching Studio, you will be greeted with a Welcome Screen. You can start a new build or choose to import existing models (Studio/LEGO Digital Designer/LDraw). It also contains useful links to learn how to use Studio or connect with the people who use it.
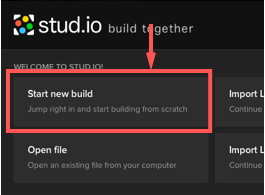
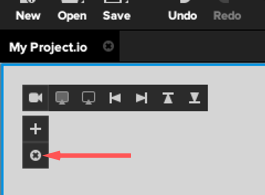
Start a new creation
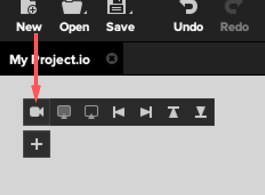
Click on Start new build to get started from the Welcome screen
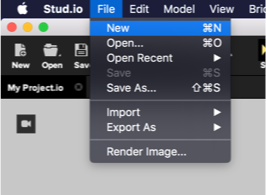
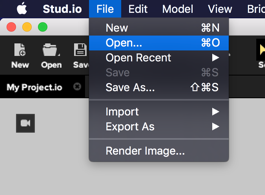
You can also create a new file through
File > New
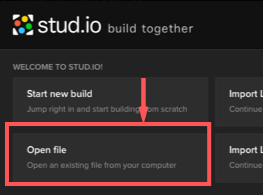
Open an existing creation
Choose Open file from the Welcome Screen
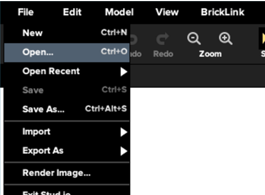
You can also open any file type through
File > Open...
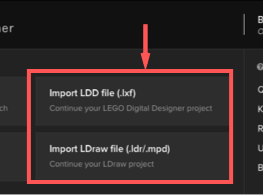
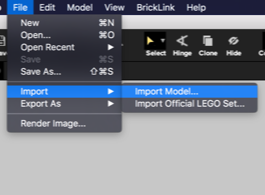
Import a LDD or LDraw model
Choose the relevant import option from the Welcome Screen
- LEGO® DIgital Designer (.lxf)
- LDraw (.ldr)
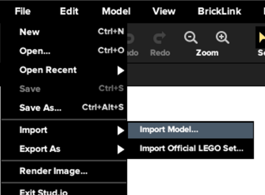
You can also import a model through
File > Import > Import Model...
All supported file types (.io/.lxf/.ldr) can either be opened or imported.
Importing will insert the file as a
submodel but opening it will open the file as is.
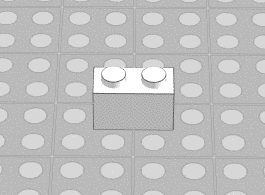
Placing and moving parts
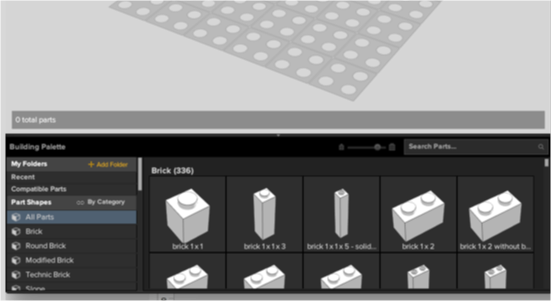
Building Palette
You can find all the parts to build with from the Building Palette. You can choose between two brick categorization options and also create custom folders that you can manage.
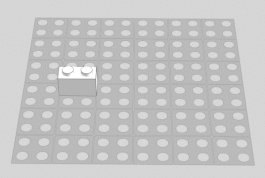
Placing a part
- Click the part that you want to use.
- Click again where you want to place the part
OR
- Drag and drop the part in the desired spot in the viewport.
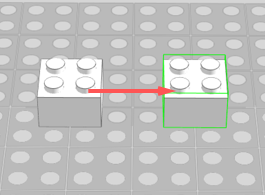
Moving a part
- Start to drag the desired part.
- Once part is in motion, click in the desired spot to place again.
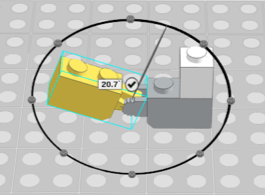
Rotating a part
- Select the part to rotate.
- Use the arrow keys or WASD keys to rotate in the desired direction.
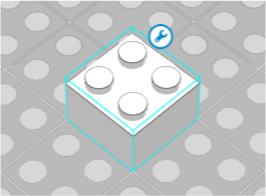
A selected part is highlighted blue with a button to activate Manual mode
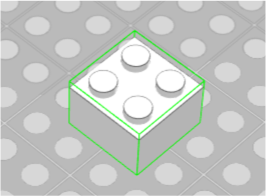
In part in motion is highlight green
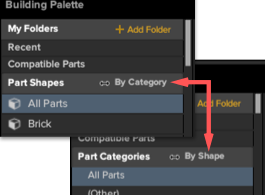
Tips for finding and managing parts
Toggle part categorization method
By Shape - See parts by its physical attributes.
By Category - See parts by their BrickLink categories.
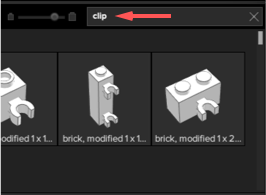
Search for parts
By Keyword - If you know some or all of its name.
By Part ID - If you know its BrickLink ID #.
ie. "3004" for Brick 1 x 2
By Size - If you know its dimensions.
ie. "4x4" for only 4 by 4 parts
ie. "2x" for all 2 by # parts
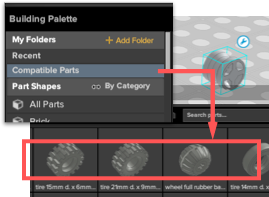
Check compatible parts
Compatible Parts - See compatible parts of the selected part in the viewport
Only parts that have special item relationships with the selected part will be shown. (ie. Tire + Wheel)
Using the building tools
Building Tools
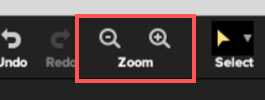
At the top of the interface, you can find your four main building tools: Select, Hinge, Clone, and Hide.
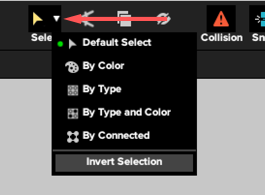
Select by attribute
-
Click the arrow next to the Select tool icon

-
Click the respective select option to perform the following on the next part you select:
Select by color
Select all parts of the same color as the selected brick
Select by type
Select all parts of the same mold type as the selected brick
Select by type and color
Selects all parts of the same mold type and color as the selected brick
Select by connected
Selects all parts that are connected to the selected brick
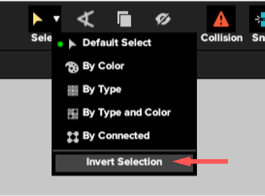
Select the opposite of current selection
- Click the arrow next to the Select tool icon to access the advanced select options
- Click "Invert Selection"
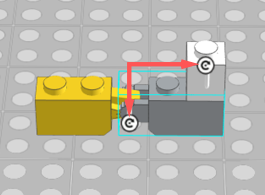
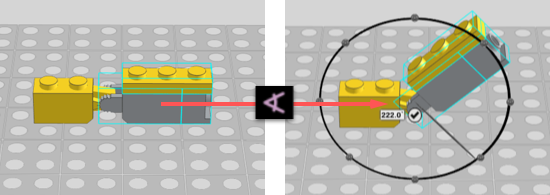
Rotate selection around connection
- Click the Hinge tool

- Select the part(s) you would like to rotate
- Set the degree of rotation using the angle selector provided
If there are multiple connections available for the selection, you must select one first.
Clone selection
- Click the Clone tool

- Select the part(s) you would like to clone
- Click where you want to place the new duplicates
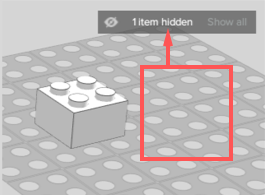
Hide selection
- Click the Hide tool

- Select the part(s) you would like to hide
- You can unhide all by press
You can make a multiple selection before using a tool to combine it’s effects
Choosing part colors
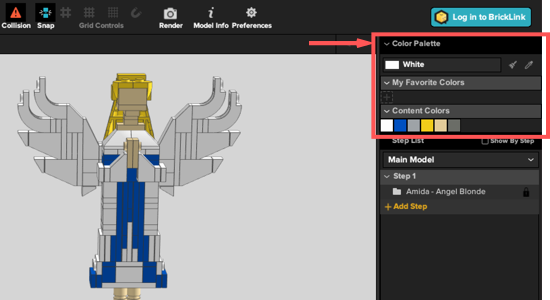
Color Palette
From the Color Palette, you can assign colors to parts and also check what colors are available for a certain ones.
Change part color
- Select the desired part(s).
- Choose a new color from the dropdown.
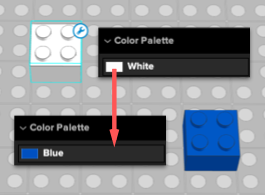
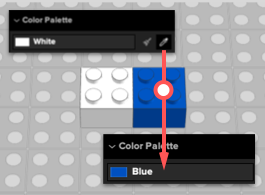
Extract color from part
- Select the Eyedropper tool.
- Click a part to extract its color.
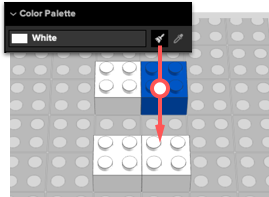
Paint color on part
- Select the Paint tool.
- Click a part to paint it with the chosen color.
Tips for finding and managing colors
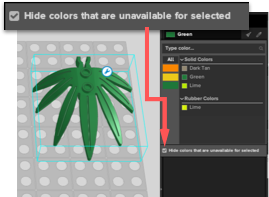
See only colors available for part on BrickLink
- In the color dropdown, enable "Hide colors that are unavailable for selected"
- Select a part to see only its available colors in the color dropdown
You can select multiple parts while this option is enabled to see their shared available colors.
Assigning parts to steps
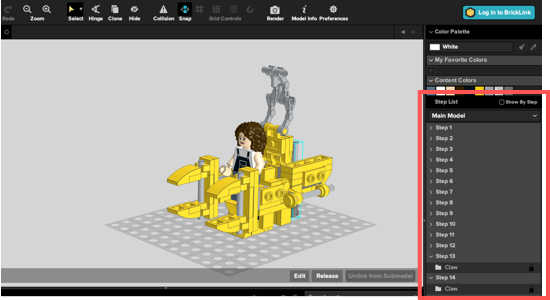
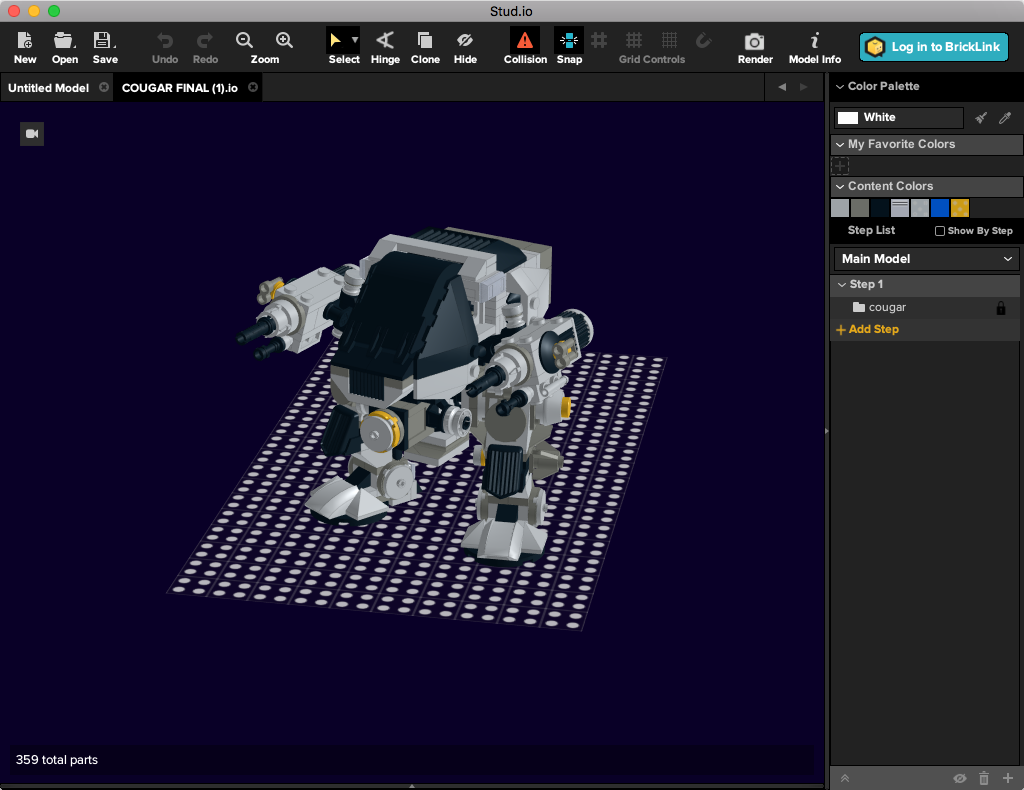
Step List
The step list is an important part of documenting and being able to share your creation. By assigning parts to steps, you can tell the story of how to build your creation.
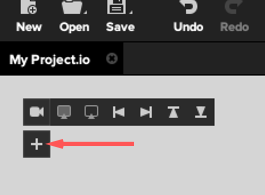
Create new step
- Click the Add step shortcut
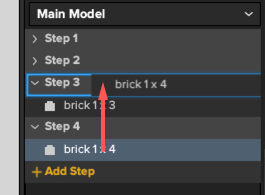
Move part(s) from step to step
- Select the part(s) to move
- Drag the selection into or under the step that you are moving to
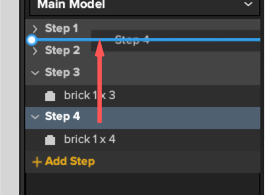
Change position of step
- Drag the step to its new position. You can drag it before or after any step.
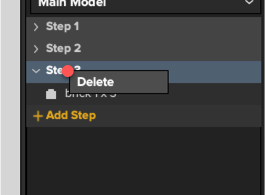
Delete a step
- Right click the step
- Select Delete
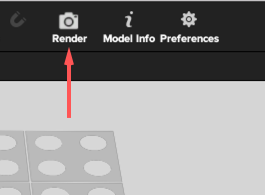
Render creation
Create a high quality render straight from the Studio app. You can customize settings like the background color and size when you render.
Access Render Image...
- Click Render from the tool bar
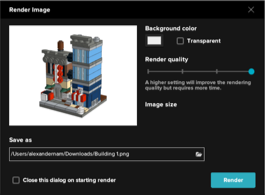
Choose settings
Background color
Choose the background color for the render
Transparent
Make the background transparent
Render quality
Choose the quality of the render
Image size
Choose the final image size
Save as
Choose the location to save render
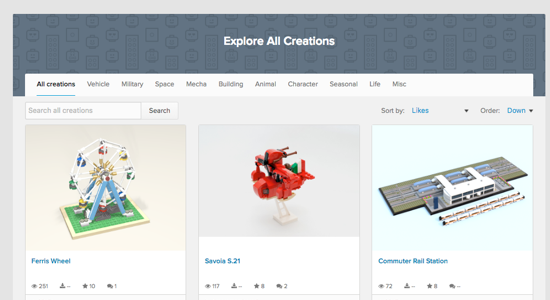
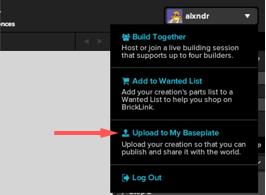
Upload creation
Upload your creation to BrickLink to either share in the gallery or shop for in the marketplace. You must be logged in to a BrickLink account to use this feature.
Must be logged in to BrickLink
Click "Login to BrickLink" to enter credentials
If you would like to create a BrickLink account, visit the registration page
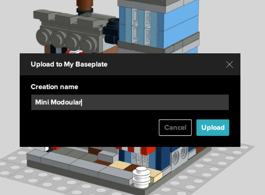
Click "Upload to My Baseplate"
Located in your BrickLink account menu
Give your creation a name
This is the name your creation will have inside your Baseplate page
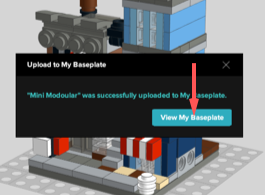
Follow to the baseplate
Your Baseplate page stores all your uploads.
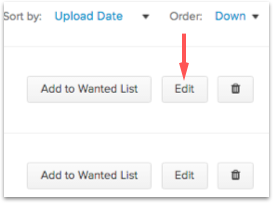
Publish your creation
All your uploads start out private. You can publish them to share it in the gallery.
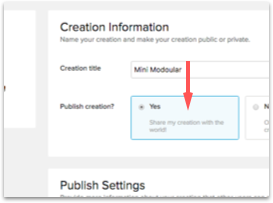
1. Click Edit next to the creation
2. Choose Yes to publish creation
Buy creation
Purchase the parts for your creation on BrickLink so you can build it in real life. You can create a BrickLink wanted list directly from the Studio app which will help you find the right store(s) to get the parts you need.
Must be logged in to BrickLink
Click "Login to BrickLink" to enter credentials
If you would like to create a BrickLink account, visit the registration page
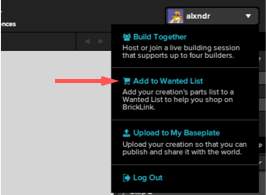
Click "Add to Wanted List"
Located in your BrickLink account menu
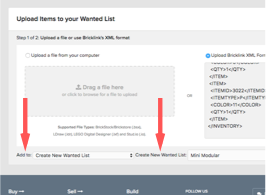
Choose the wanted list to add to
You can create a new wanted list to add to or choose an existing one
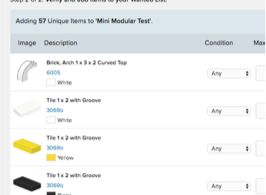
Verify the parts list
Click Verify to inspect the parts to upload
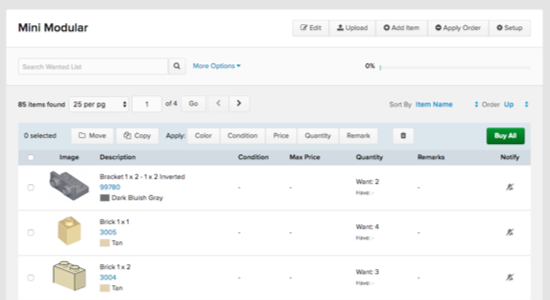
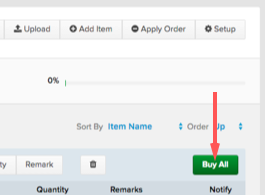
Buy wanted list
If you are ready to purchase the wanted list, click Buy All to find the store(s) that can fulfill your creation
 + Drag mouse
 + Drag mouse
 + Drag mouse