| The new Wanted List Buy page replaces the old By Shop page and comes with some new features to make it easier to complete your Wanted Lists. Because it is usually difficult to find one store that completes an entire Wanted List, we designed the new Buy page to support the ability to build up multiple store carts simultaneously. |
| Step 1 of 4: Choose Wanted Lists & Wanted Items to Buy |

In the first step, you can which can specify which Wanted Lists[1]
Advanced Option: In the Wanted items tab, click the lock icon to specify items which are required for stores to have. When required items are selected, only stores that carry the required items will be shown in the search results. This is a great way to concentrate on hard to get items first.
In the right-hand panel, you will see a list of stores which have items from your selected Wanted Lists and Wanted Items available. The default sort option will list the store with the most unique lots available from the selected Wanted Lists & Wanted Items on top. Click Expand[3] next to Store Filters to specify additional store criteria such as location, currency, and accepted payment type.
|
| Step 2 of 4: Select Stores to Buy From |
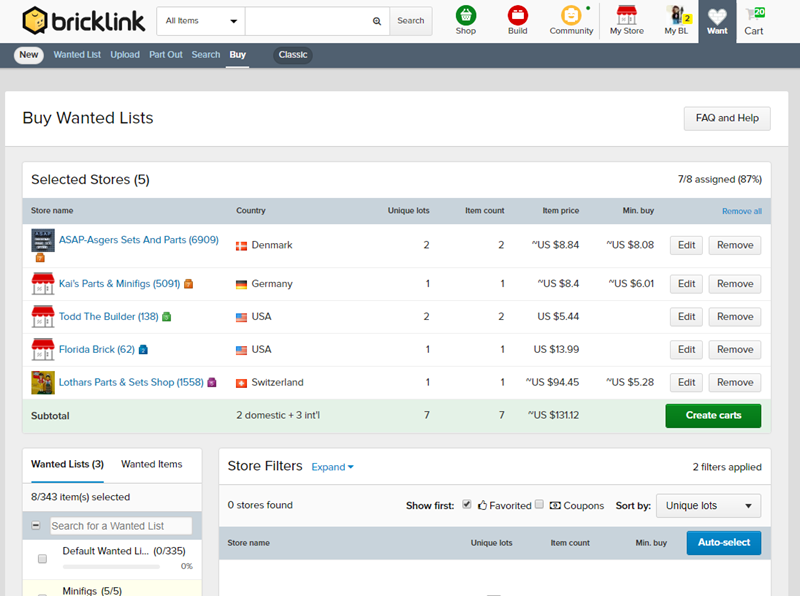 The next step is to select the store(s) in order to complete your chosen Wanted Lists and Wanted Items. This can be done manually or automatically with Auto-select.
|
| Step 3 of 4: Create Carts |

Once you select stores and confirm the items to buy within each store, you will notice that they will move to the Selected Stores section at the top of the page. You will be able to see how many lots are assigned from the items chosen in Step 1 based on the stores in this section. Once you manually or automatically select the best combination of stores, click on the Create Carts button to create carts out of the store(s) you have selected. |
| Step 4 of 4: Review Carts |

From here, you can see a summary of the carts you created in the stores that you selected. If you follow the Checkout button next to each respective store, you will be redirected to the store cart where you can choose to either checkout or continue shopping for other items you may be interested in. |
| ||||||||